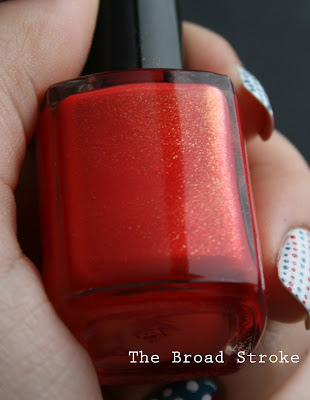
Wednesday, February 29, 2012

Julep Box: March Bombshell

Today, I got a nice little stack of packages.  The last of my franken bases showed up and I promptly started finishing formulas and bottling my custom polishes.  I also got a nice big glitter shipment that I set about testing to see if they're solvent resistant.  I'm going to report on all of that later, but for now, my third package of the day has me scratching my head...

My Julep Maven box showed up and I was actually really excited about it.  After hours of mixing and pouring, I painted my nails with Natasha and Sofia.


I'm kind of sitting here wondering what I was thinking when I went ahead and painted this on my nails.  You see, I did a nail wheel swatch and I thought the same thing.  "This is horrid," I text my BFF.  But I still did it.  These two colors are from the March Bombshell box by Julep.  I'm an "It Girl" according to their quiz, but that box didn't speak to me as loudly as the Bombshell (It was the green, in case you were wondering).  But looking at the green over the orange, I just can't.  I CAN'T.  


On the plus side, I like Natasha A LOT.  So let's just forget the whole thing where I layered them on top of each other, like I thought Julep intended, ever happened and talk about her.  I thought she was similar to one of my America Apparel polishes, Lopez Canyon, and she is a little, but Natasha is brighter.  In this photo, you can see Lopez Canyon, Natasha, Lopez Canyon and Natasha.


I was a little annoyed with the application at first because the Julep bottle requires them to put a very long brush in it and I had a lot running down the stem.  In addition, the second coat was pretty thick and I still had visible nail line.  I cooled my jets for a few minutes to let it dry then added a third coat and finally got an even, beautiful coverage.  


And then, of course, I went and ruined it with Sofia... *grumble grumble*  I honestly like Sofia, just not with the polish it came with.  I'm going to forgive her eventually, give her another chance one day, maybe over blue...  I had originally considered ordering one more of the top coats, but I'm going to wait and see what other bloggers have to say about them at this point.  Unless they're way more awesome, I'm going to pass.


Just to end on a positive note, I want to show you one of my latest test creations.  I did this swatch really quick to send to my BFF with Natasha right before I did my earlier manicure.  I think it's a good way to cheer myself up to look at it again.

Thanks for reading!

Tuesday, February 28, 2012

Funky Shapes and Disco Biscuit!

If you follow me on the FB and Twitter machines, you might have caught that last night I broke the thumbnail on my blogging hand.  I was completely tragic, but not entirely unexpected.  A while ago, I was chopping onions and the knife slipped and nicked the middle of my thumbnail.  I was really happy at that point that I had fingernails to protect my fingers, let me tell you.  However, I did damage the nail.  As it grew out, it cracked and I used nail glue to help it keep from cracking anymore.  I considered investing in a repair kit, but it seemed to be working out just fine as it was and I didn't think about it.

Well, the last time I went to file my nails down, the crack had just about grown out and I was happy.  But then, after a few days, it broke.  It was really just a little chip, but the problem was that it wasn't across the top, it was diagonal from the tip down the side a little ways.  I really hate having nails that are significantly different in size, so I knew I would have to file them all down and got to work.


Which is where I decided to play with my nail shape and do some funky asymmetrical curves for kicks.

This is temporary, so if you hate it, don't fret.  I'm just always up for playing around with my nails.  Since I'm going to take them all down to almost nubs in a day or two, I figured it would be fun to play around with.


I did pretty well over the weekend and only bought one polish, Butter London's Disco Biscuit.  Aside from the awesomely bright and bold pink color and the beautiful glitter inside, the name is pretty much my favorite thing to say...  I am such an annoying person, I don't know how anyone puts up with me...  Anyway!  The only reason I ended up with it was because my hubby needed a get-out-of-jail-free card, and he knew that I'd been eyeing it and kept saying, "No, I don't need it..."  There's a big local specialty foods store a town over that we visit a lot/spend too much money at, and it has a big bath & beauty section.  They happen to sell Butter London cheaper than anywhere else, so score!  


I actually had a fairly good reason for not buying Disco Biscuit despite how much I kind of loved it.  It's very similar to OPI's Be A Dahlia Won't You, the major differences being opacity/consistency and the color of the flecks in each.  However, when I compared them on a wheel, I immediately thought, "OMG, let's layer them!"  This convinced me that I did, in fact, need Disco Biscuit.  Pink flecks + iridescent purple flecks?  YES.  PLEASE.  

It's a little bit hard to capture the effect in a photo, so I apologize if you can't see it very well.  It's so gorgeous and outrageous on my nails, I just love it.  This is two coats of Be a Dahlia with two coats of Disco Biscuit on top.


In any case, this is my first asymmetrical nail design.  I'm a little underwhelmed, even with sparkly rhinestone accents, but I decided to show it to you anyway. It's pretty basic.  I wanted the lines to kind of accentuate the shape of the nail, but I did a bad job...


My eyes gravitate to the bottle more than my nails here, so I don't blame you if you feel the same way...


DISCO BISCUIT!


Totally uncalled for, I know >_>

Thanks for reading!

Monday, February 27, 2012

Nubar Reclaim and Orly Sec 'n Dry

Good day, everyone!  I hope you all had a nice weekend.  I had a great one with the hubby because I very expertly conned him into adopting a hamster with me.  She's a gray dwarf and is currently sleeping, but her name is Prudence and she's pretty laid-back and used to having a hand stuck in her cage already, so we're hoping she'll be tame soon enough!  She likes to bite my nails though, just little nips of curiosity I think so far, so I'm going to have to offer her my right hand and not my left one!  She got to run around in her ball for about ten minutes last night and chased my little chicken dog around the house already.  D'awwww.

As much as I'm sure you love to hear about my pets, I do have some nail polish to talk about.  =)


I'm really excited to show you this weekend manicure for two reasons: Green Holo [!!!] and these pictures were taken today, as in, this afternoon, on its third day.


This is the third Nubar polish that I got for my birthday last month and probably the one that I wanted most of all.  I have Glitter Gal's Lizard Belly, which is a dark green holographic polish, but Reclaim is much lighter and more affordable.  Reclaim is also a linear holo, which you can see in the pictures.  The rainbow effect is really fine and just gorgeous.


These pictures show three coats, though I could have stopped at two, but I went with three because I wanted to see if the holo effect would intensify with a third coat.  It didn't, so just two coats next time.  The formula on this polish is so good, it's creamy and smooth and very easy to apply.  They also have one coat of Orly's Sec 'n Dry, which I was testing in my search for a toluene free top coat that works for me.


And well, Orly definitely worked!  As I previously mentioned, I wore this all weekend and come Monday, I have a manicure that is still looking almost perfect.  I noticed in a few pictures, though not in real life, that there's a tiny bit of tip wear starting.  I didn't bother to wrap my tips this time either, because I actually counted on having time to repaint on Saturday or Sunday.  However, no wear on such a fascinating color made me put it off both days.


I'm actually kind of debating whether or not I want to repaint them tonight or not.  I do want to show you some swatches of my custom blended polishes and Butter London's Disco Biscuit, but this is just so pretty!  It's the weirdest feeling in the world, NOT wanting to repaint my nails.  I think maybe I'm ill...


Thanks for reading!

Friday, February 24, 2012

Franken Friday: Black Based Shimmers

Hello everyone!  Today I've got another couple frankens to show you and this time I have swatches!

After I put together my base colors yesterday, I decided to get to some of the ingredients that I bought to have fun with.  TKB Trading recently started carrying loose flakies, so I ordered samples of them all to give them a test.  I tried them on their own in a suspension base and used them as a top coat over black, but I wasn't too impressed with the colors.  They're not as bright as what you find in premixed polishes, like the Finger Paints Special Effects collection for example and I probably wouldn't reach for it over them.  I decided to do some other experiments with them.


I wanted to experiment with black based shimmery colors, so I tinted my flaky base and added my pigments. This is the almost finished, unnamed product.


It comes off with a little bit of a rubbery finish.  On my index and ring fingers, I added top coat to compare.  my middle and pinky fingers have no top coat.  I want to try to shine it up a little when I get my last shipment.


In the bottle, you can see a lot of flakies, but they don't all get translated to the nail very well.  I think that I need to add more because of the vibrancy issue.


The color is something that I really liked in this one.  The pigment has a color shifting quality to it, blue to purple, that really shows through the black base.


It kind of makes me want to mix it into a top coat and give that a little try as well, but that's on the agenda for another day.


Overall, an interesting experiment and a better use for those flakies than a top coat.


This is the second color I mixed with some of the flakies and it turned out to be a bit of a waste for them, but a really pretty color nonetheless.  


You can see the flakies in the bottle, but they get completely lost on the nail.  If I mix this up again in the future, I won't bother with them.


The black I used is turning out to be a little green based so it took the gold pigment and made it look greenish, which I have no problem with.  


The finish is a little more shiny in general in this bottle, though I did the same top coat and no top coat nail combination to compare.  My camera couldn't seem to pick up a good shot to show you the difference.


So happy Friday everyone!  Enjoy your weekend and thanks for reading!

Thursday, February 23, 2012

Nail Art: Hello Kupo!

A few posts ago, I mentioned that I wanted to do a Hello Kitty manicure because for as much as I love her, I've never done one.  I got sidetracked though by my husband playing Final Fantasy XIII-2 (Which he bought for me  only to end up obsessed with, of course!)  I really wanted to do some nail art for that as well, so when I sat down to do this, I decided that Hello Kitty and Mog the Moogle looked awesomely similar.


My hand is still not as steady as normal, so I hope you can forgive the kitty on my ring finger.  When I text my BFF a picture, she said it wasn't bad, HK just looked like she's melting...  In any case, voila, some freehand art again!  


I really wanted to use my bottle of Mermaid's Tears by OPI because it was so nice and creamy when I swatched it.  

Also, I wanted to show you where I stand with my frankens!  If you follow my page on the FB machine, you'll have seen most of these next pictures.  They're bottle shots of the polishes that I blended today.  Not all of them, only four, but over the next couple days I'm going to show you more!  I got a big package this morning with half of the bases that I ordered and a huge selection of pigments.  The problem is that I am still missing the other bases and can't actually finish most of my recipe tests and then go on to bottling.  It'll probably take another week and a half to get everything...

But I am completely covered in glitter, thanks to this hobby of mine!


This is my new and improved version of Expendable Crewman.  I'm still on the fence about keeping their Star Trek names because I'm worried that they don't appeal to as many people as I would like.  Perhaps I can bribe some of you with a bottle naming contest?  We'll have to discuss this option when I get the rest of my supplies and finalize the colors!


A new version of I'm A Doctor, Not A Nail Polish!


Then we have the base color for Tiberius.  This is pre-glitter.  I'm playing with different sizes and colors in it at this point, but I seriously love the color in this pigment and I'm considering offering this shade without big chunky glitter.  We'll see!


Finally, I have what I'm calling "Pop Tart" thanks to one of my friends on the FB machine.  It's a white jelly with a bunch of rainbow glitter.  I have five bottles of this mixed and can probably mix two more before I run out of ingredients, and after that I may not offer it except in limited quantities, at least until I can get a bigger stock or find alternative glitters that aren't as pricey.  It runs me a bit more to produce than the other colors.  

If you're still with me, thanks for reading!

Tuesday, February 21, 2012

More Dots! More Dots!

Hey folks!  How's it going?

Firstly, before I jump into the manicure for today, I wanted to mention that I was asked to be featured on a great fashion blog, Thoughts of a Fashion Junkiiee.  She asked me a few questions and told me about her mission to revamp her blog to focus on independent and small businesses in the fashion industry.  You can find the feature here.

And now, on to the nail polish!  I've been having a little bit of wrist pain in my dominant wrist the last few days (nothing serious) so after painting my nails white and creating a blank canvas, I didn't want to do something really intricate with a shaky hand.  (Trust me, the clean up was already enough of a disaster today!)  Instead, I thought I'd get out the dotting tool and do my entry for Chalkboard Nails's nail art contest.  Nail art brushes aren't allowed, just dots!


I got my order from Zoya's Valentine's Day promo where I ordered Purity in my ongoing search for the perfect white cream.  It is a really good option, though I still had to baby it a little and did end up adding a couple drops of thinner.  It evened out pretty well at the third coat.  

The red in this manicure was my free polish, Moxie, and it is fabulous in color and formula.  I spent a bit of time trying to decide what red I wanted.  The promo offered free shipping as well, which was what had me excited because the first time I ordered from Zoya, shipping was almost as much as one of their bottles of polish and I can't get Zoya locally anymore.  In any case, I'm really happy with Moxie and Purity isn't perfect but it's workable, so it was an all around good deal.


The blue is also a Zoya, Breezi, one of my favorite polishes in my stash for both its lovely color and its flawless application.  I got it in another promo where it was free.  I think this post is probably the biggest plug for following Zoya on the FB or Twitter machines for their promos because honestly, two out of three were free polishes and that isn't bad!  

But enough with the pitches!

Since nail art brushes were prohibited for the contest, I used the brushes in the bottles, which were very easy to use for this design, for one thing because Zoya has smaller brushes.  Then I used different sized dotting tools and voila!  That's about all there was to it!

Thanks for reading!

Monday, February 20, 2012

Sponging: Glass-Flecked Pretties

I was pretty busy this weekend, so I haven't sat down with my blog and put up any posts and I apologize!   I have a post today though on the manicure that I've been wearing for the last few days.


Orly's Space Cadet from their Cosmic FX Collection is an older polish, but it was one of those that I wanted sooooo badly and my husband had to listen to me talk about for a week.  Everywhere I went, I'd see a few of the other polishes from that collection, but not Space Cadet.  Finally though, I managed to scoop it up in a blog sale one day, much to  the hubby's relief.  I really love Orly polishes because they love my nail chemistry and wear forever, but I usually forget this and buy something else.  


I started with a base of three coats of Space Cadet for this mani and I actually wore it by itself for a day so I could stare at my fingers all day.  I wish I was kidding...  You see that beautiful duochrome effect all up in that bottle?  All over my nails.  For serious, it's beautiful.


I decided that it needed to be more interesting the next day and sponged on Orly's Lunar Eclipse, OPI's The One That Got Away and OPI's Take the Stage.  I kind of treated them like galaxy nails, but stopped before I added too many colors or glitter.  

It was a really simple and quick mani, but I'm ready to get back to some more intricate nail art!  Tonight, I'm either going to do another Candyland mani or a Hello Kitty one!  Any preferences?

Thanks for reading!

Thursday, February 16, 2012

Cult Nails: Toxic Seaweed

Today I received my order from Cult Nails in the mail and immediately had to jump on the Toxic Seaweed bandwagon.  I mean, come on, it's green and it's beautiful!  Are you ready for a picture spam?


I wasn't too interested in the whole collection from Cult Nails that this polish is a part of because I didn't think I would really wear the neutrals often enough to justify buying them all.  However, the moment I saw Toxic Seaweed, I needed it in my life.  


This polish is a beautiful dark forest green jelly packed with glitter and flakies.  It's been mentioned that it is a limited edition because they aren't sure if they can find new flakies once this supply is gone.  It doesn't appear to be a small batch though because it's still available for purchase on the Cult Nails website.  (It's not too late!!)  I did buy two bottles when it was finally listed for individual sale because I wanted a backup bottle, just in case.  


I did some nail wheel swatching before I painted and it's really a gorgeous color on its own, but when I layered it over China Glaze's Glittering Garland, I was sooo mesmerized.  It leans a little bit blue on its own and I really was looking for this deep forest green today.  These photos show two coats of Glittering Garland with one coat of Toxic Seaweed on top.  


In addition to Toxic Seaweed, I also bought their top coat and base coat combo because I've been reading good things about Wicked Fast.  I used two coats of it on top of the color because one was just a little too thin to hide all the grittiness from the glitters.  I was really impressed with how shiny this top coat is, almost as pretty as OPI's DS top coat.  I'm excited to see if it is also as durable!


The shine was so easy to capture in these pictures that it made it hard to see the polish underneath all that light!


The flakies in Toxic Seaweed are also color shifting from copper to green.  I tried to take pictures from different angles so you could see the effect here.


This is definitely my favorite polish released this year so far and it's going to be tough to beat!  

Thanks for reading!
Tuesday, February 14, 2012

Valentine's Day: Pacman & Ms Pacman

My last post featured my BFFs and mentioned a contest that revolves around getting your favorite guy to sport some polish with you.  My hubby is a chronic nail biter who also destroys his cuticles like nobody's business.  However, out of love for me, and not wanting to have pictures taken with bloody fingers (Ew), he has spent and entire week pampering his nails for this manicure.


My hubby and I are total video game geeks, so when I told him about this contest, he was excited and actually suggested this before anything else.  


He took the night off from work for Valentine's Day, because he's a sweet kid like that.  We have a fondue dinner ever year and just finished our cheese course, which has us both stuffed.  I don't know HOW we're going to eat anymore...So we took a break to take some photos!


It was super fun to do his nails and even more exciting that he's not ripping them up right now!


And he loved them!  After we'd taken our photos, he told me, "You can paint my nails for fun again if you want!"

If you like us, you can come vote for us in the contest here!

Happy Valentine's!  Back to dinner!